
Creating a cardboard house is an enjoyable project that allows you to explore your creativity. Whether you’re looking to build a fun playhouse for children or an artistic model for a school project, this guide will walk you through the steps. At Cheshire Clearance & Removals Ltd, we understand the importance of creative projects that can be done with simple materials. This guide will help you make the most out of everyday items, turning them into something extraordinary.
Discover How to Make a Cardboard House
Choose the Right Cardboard
Selecting sturdy cardboard is essential for building a durable house. Ensure the cardboard you choose is thick enough to support the structure. Corrugated cardboard, often used for shipping boxes, is an excellent option. Look for large pieces without too many folds or creases. If the cardboard is too thin, consider layering it to add strength. With the right material, your cardboard house will stand tall and last longer.

Gather Necessary Tools and Materials
Having all the tools and materials ready before starting makes the process smoother. You’ll need a ruler, pencil, scissors or a craft knife, tape, and glue. Additionally, decorative materials like paint, stickers, and markers will help personalise your cardboard house. Make sure to work in a well-lit area to avoid mistakes. Having everything within reach ensures that you can work efficiently and enjoy the process.
Plan Your Design
Before cutting anything, it’s important to plan your design. Decide on the size and shape of the house, taking into account where it will be placed. Sketch a rough design on paper, including details like windows, doors, and roof. This plan will guide your work, helping you stay organised and focused. A well-thought-out design prevents unnecessary waste of materials and time.
Measure and Mark the Cardboard
Accurate measurements are key to a well-built cardboard house. Use a ruler to measure the dimensions for each part of the house, then mark the cardboard with a pencil. Double-check your measurements to ensure everything fits together properly. Precise marking makes the cutting process easier and reduces the chance of errors. This step lays the foundation for a successful project.
Cut Out the Main Pieces
With the design marked, it’s time to cut out the main pieces. Carefully use scissors or a craft knife to cut along the lines. Start with the walls, then move on to the roof and floor. If the cardboard is tough, cutting slowly and steadily will give you cleaner edges. Make sure each piece matches the measurements you planned. Properly cut pieces fit together more securely, making the assembly process smoother.
Assemble the Walls
Now that the pieces are cut, it’s time to start assembling. Begin by attaching the walls together using tape or glue. Hold the edges firmly while the adhesive sets to ensure a strong bond. If necessary, reinforce the joints with extra tape inside the house. Aligning the walls correctly at this stage is crucial for the stability of the structure. Once the walls are up, your house will start taking shape.
Add Windows and Doors
No house is complete without windows and doors. Decide where you want these features, then carefully cut them out. Make sure they’re proportionate to the size of the house. If desired, add frames or shutters for a more realistic look. Windows and doors not only enhance the appearance but also allow you to peek inside. This step adds character and functionality to your cardboard house.
Create the Roof
The roof is a vital part of your cardboard house, providing the finishing touch. Measure the roof pieces to fit the walls perfectly. You can choose a flat roof or a more traditional pitched roof. Once cut, attach the roof securely with glue or tape. If you want to add shingles, cut small strips of cardboard and layer them on top. A well-made roof adds to the overall stability and aesthetics of the house.
Strengthen the Structure
To ensure your cardboard house stands the test of time, consider reinforcing it. Add extra layers of cardboard to the walls and roof, focusing on the corners and edges. This step is especially important if the house will be used as a playhouse. Reinforcing the structure prevents it from collapsing under pressure. With a sturdy build, your house will be more durable and long-lasting.
Decorate the Exterior
Now that the house is built, it’s time to get creative with decorations. Paint the exterior in bright colours, or cover it with patterned paper. Add details like brick designs, flowers, or even a mailbox. Decorating the exterior is where your personality shines through. Make your cardboard house as simple or as elaborate as you like. This is the step that truly brings your house to life.
Furnish the Interior
Why stop at the exterior? Consider adding some furniture to the inside of your cardboard house. Create mini chairs, tables, and beds using leftover cardboard. Paint and decorate them to match the style of the house. Furnishing the interior adds another layer of creativity and makes the house feel more complete. Even the smallest details can make a big difference.
Add Landscaping
To enhance the look of your cardboard house, add some landscaping around it. Create a lawn with green paper, or cut out trees and flowers from cardboard. You could even add a pathway or a small fence. Landscaping makes the house look more realistic and adds a fun element to the project. With these additions, your cardboard house will look like a cosy home.
Build Additional Rooms
If you’re feeling ambitious, why not expand your cardboard house by adding more rooms? Simply follow the same steps to create additional walls and attach them to the main structure. Adding rooms allows for more creative possibilities, such as different themes for each room. This is a great way to make the project more challenging and rewarding.
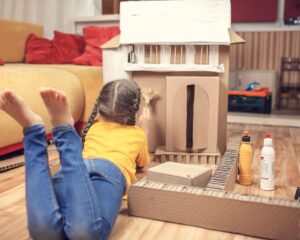
Personalise with Accessories
Accessories can add a unique touch to your cardboard house. Consider adding a chimney, balcony, or even a swing set in the yard. These small additions make the house more interesting and personalised. Use your imagination to think of other accessories that could enhance your design. Every accessory adds another layer of detail and fun.
Involve Others in the Project
Making a cardboard house can be even more enjoyable when shared with others. Involve family members or friends in the process. Assign different tasks, such as cutting, assembling, or decorating. Working together makes the project faster and more enjoyable. Plus, it’s a great way to bond and create something special as a team.
Experiment with Different Shapes
Don’t feel limited to a traditional house shape. Experiment with different shapes and designs. Try building a roundhouse, a tall tower, or even a multi-level structure. Experimenting with shapes allows you to explore new techniques and ideas. It also makes your project stand out as something truly unique.
Use Recycled Materials
Building a cardboard house is a great opportunity to use recycled materials. Instead of buying new cardboard, collect boxes from around the house or ask neighbours for their unwanted boxes. Recycling materials is not only cost-effective but also environmentally friendly. It’s a wonderful way to give new life to items that would otherwise be thrown away.
Add Lighting Effects
If you want to take your cardboard house to the next level, consider adding lighting. Use small LED lights or fairy lights to illuminate the interior or exterior. Lighting adds a magical touch, especially if the house will be displayed in a dimly lit room. It’s a simple addition that can make your cardboard house stand out.
Explore Seasonal Themes
Why not create a cardboard house that fits a specific season or holiday? For example, decorate it as a haunted house for Halloween or a gingerbread house for Christmas. Seasonal themes add a festive element to your project and can be changed throughout the year. It’s a fun way to keep your cardboard house relevant and exciting.
Create a Mini Neighbourhood
If you’ve enjoyed building one house, consider creating an entire neighbourhood. Build multiple houses with different designs and arrange them together. Add streets, parks, and other community features. Creating a mini neighbourhood is a more challenging project but offers endless creative possibilities. It’s perfect for display or as a play area for children.
Incorporate Educational Elements
Building a cardboard house can be a great learning experience. Incorporate educational elements, such as teaching children about architecture, design, and measurements. You could also include lessons on recycling and environmental responsibility. Combining fun with education makes the project even more valuable and rewarding.
Display Your Cardboard House
Once your cardboard house is complete, find a special place to display it. Whether it’s in a bedroom, living room, or classroom, displaying your work allows you to enjoy and share it with others. Consider placing it on a sturdy table or shelf to keep it safe. Proudly displaying your creation is the final step in the project.

Reflect on the Experience
After finishing your cardboard house, take some time to reflect on the experience. Think about what you learned, what you enjoyed most, and what you might do differently next time. Reflection helps you appreciate the effort you put into the project and can inspire new ideas for future creations.
Store or Recycle the House
If you don’t plan to keep the cardboard house permanently, consider storing it for future use or recycling it. Carefully disassemble the house and store the pieces in a dry place if you want to rebuild it later. If you choose to recycle, ensure that all the materials are disposed of properly. Storing or recycling responsibly ensures that the project remains environmentally friendly.
Conclusion
Making a cardboard house is a fun and rewarding project that allows you to unleash your creativity. With just a few simple materials and a bit of imagination, you can create something truly special. At Cheshire Clearance & Removals Ltd, we believe in the power of creativity and the joy it brings. Whether you’re building a playhouse for children or a detailed model for display, this guide provides everything you need to get started. Enjoy the process, and don’t be afraid to experiment and make it your own.

