
Welcome to Cheshire Clearance & Removals Ltd’s ultimate guide on how to make your own pallet deck. Building a pallet deck is a fantastic way to create an outdoor space for relaxation and entertainment without breaking the bank. With our step-by-step instructions, you’ll be able to transform wooden pallets into a stylish and functional deck. Let’s get started on this exciting DIY project!
How to make your own pallet deck
Planning Your Pallet Deck
Start by planning the size and layout of your pallet deck. Measure the area where you want to build it and sketch out your design. Proper planning ensures you have enough materials and helps you visualise the final result.
Choosing the Right Pallets
Select pallets that are in good condition and free from damage. Look for pallets marked “HT” (heat-treated) rather than chemically treated ones. This choice is important for both durability and safety.
Gathering Essential Tools
Collect all the tools you’ll need for building your pallet deck. Ensure you have a hammer, nails, screws, a drill, a saw, and a measuring tape. Having the right tools on hand makes the construction process smoother and more efficient.
Preparing the Ground
Prepare the ground where you’ll place your pallet deck. Clear the area of debris and level the ground. A stable and level foundation is crucial for the stability and longevity of your deck.
Creating a Base Frame
Construct a sturdy base frame for your deck using wooden beams or additional pallets. The base frame supports the weight of the deck and ensures even distribution. Make sure it’s level and securely fastened.
Arranging the Pallets
Lay the pallets on top of the base frame in your desired pattern. Ensure they fit snugly together without large gaps. You can cut pallets to size if needed to achieve a perfect fit.
Securing the Pallets
Secure the pallets to the base frame using screws or nails. This step ensures that the pallets stay in place and provides a solid surface for your deck. Double-check for any loose areas and reinforce as necessary.
Sanding the Pallets
Sand the surface of the pallets to remove rough edges and splinters. This step is important for safety and comfort. A smooth surface also makes the deck look more polished and professional.
Treating the Wood
Apply a wood preservative to protect the pallets from weather damage and pests. This treatment extends the life of your deck and keeps it looking great. Choose a preservative suitable for outdoor use.
Adding a Protective Sealant
After treating the wood, apply a sealant to further protect your deck. Sealant adds a layer of protection against moisture and UV rays. It also enhances the wood’s natural beauty and colour.
Installing Deck Boards
For a more finished look, you can install deck boards over the pallets. Use high-quality wood for the deck boards and secure them with screws. This step provides a smooth and even surface.
Filling Gaps
Fill any gaps between the pallets or deck boards with wood filler. Filling gaps prevents dirt and debris from accumulating and gives your deck a seamless appearance. Allow the filler to dry completely before proceeding.
Painting or Staining the Deck
Consider painting or staining your pallet deck to match your garden’s aesthetic. Choose a high-quality exterior paint or stain that can withstand weather conditions. Painting or staining also adds an extra layer of protection.
Adding a Border
Add a border around your deck for a finished look. Use treated timber to create a neat edge that defines the deck area. A border also prevents the edges from wearing down and adds structural integrity.
Building Steps
If your deck is elevated, build steps for easy access. Use the same type of wood as the deck for a cohesive look. Ensure the steps are sturdy and securely attached to the deck.
Installing Railings
For safety, consider installing railings around your deck. Railings provide support and prevent accidental falls. Choose a style that complements your deck design and ensure they are firmly secured.
Creating Seating Areas
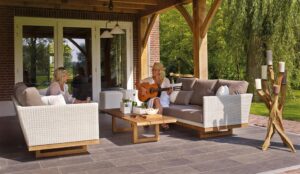
Incorporate built-in seating or add outdoor furniture to your deck. Comfortable seating areas make your deck a more inviting space. Arrange furniture to maximise the use of space and create a cosy atmosphere.
Adding Planters
Integrate planters into your deck design. Use wooden boxes or pots to grow flowers, herbs, or vegetables. Planters add greenery and life to your deck, enhancing its visual appeal.
Incorporating Lighting
Install outdoor lighting to use your deck in the evening. Solar lights, string lights, or lanterns create a warm and inviting ambience. Lighting also enhances safety by illuminating the deck area.
Creating Shade
Consider adding a shade structure to your deck. Options include pergolas, awnings, or large umbrellas. Shade provides relief from the sun and allows you to enjoy your deck comfortably during hot days.
Adding Decorative Elements
Incorporate decorative elements like cushions, rugs, and outdoor art. Personalising your deck with decor makes it a more enjoyable and stylish space. Choose weather-resistant materials to withstand outdoor conditions.
Maintaining Your Deck
Regularly maintain your pallet deck to keep it in top condition. Clean the deck periodically and reapply sealant as needed. Regular maintenance extends the life of your deck and keeps it looking fresh.

Protecting Against Pests
Protect your deck from pests by applying insect-repellent treatments. Regularly inspect the deck for signs of pests and address issues promptly. Preventing infestations keeps your deck safe and usable.
Enjoying Your Pallet Deck
Finally, take time to enjoy your new pallet deck. Host gatherings, relax with a book, or simply appreciate the outdoors. Your hard work has created a beautiful and functional space for everyone to enjoy.
Conclusion
Building your own pallet deck is a rewarding project that enhances your garden’s usability and charm. At Cheshire Clearance & Removals Ltd, we hope our guide has inspired you to take on this DIY adventure. With creativity and effort, you can create a stunning outdoor space that adds value and enjoyment to your home. Happy building!

